Aloha,
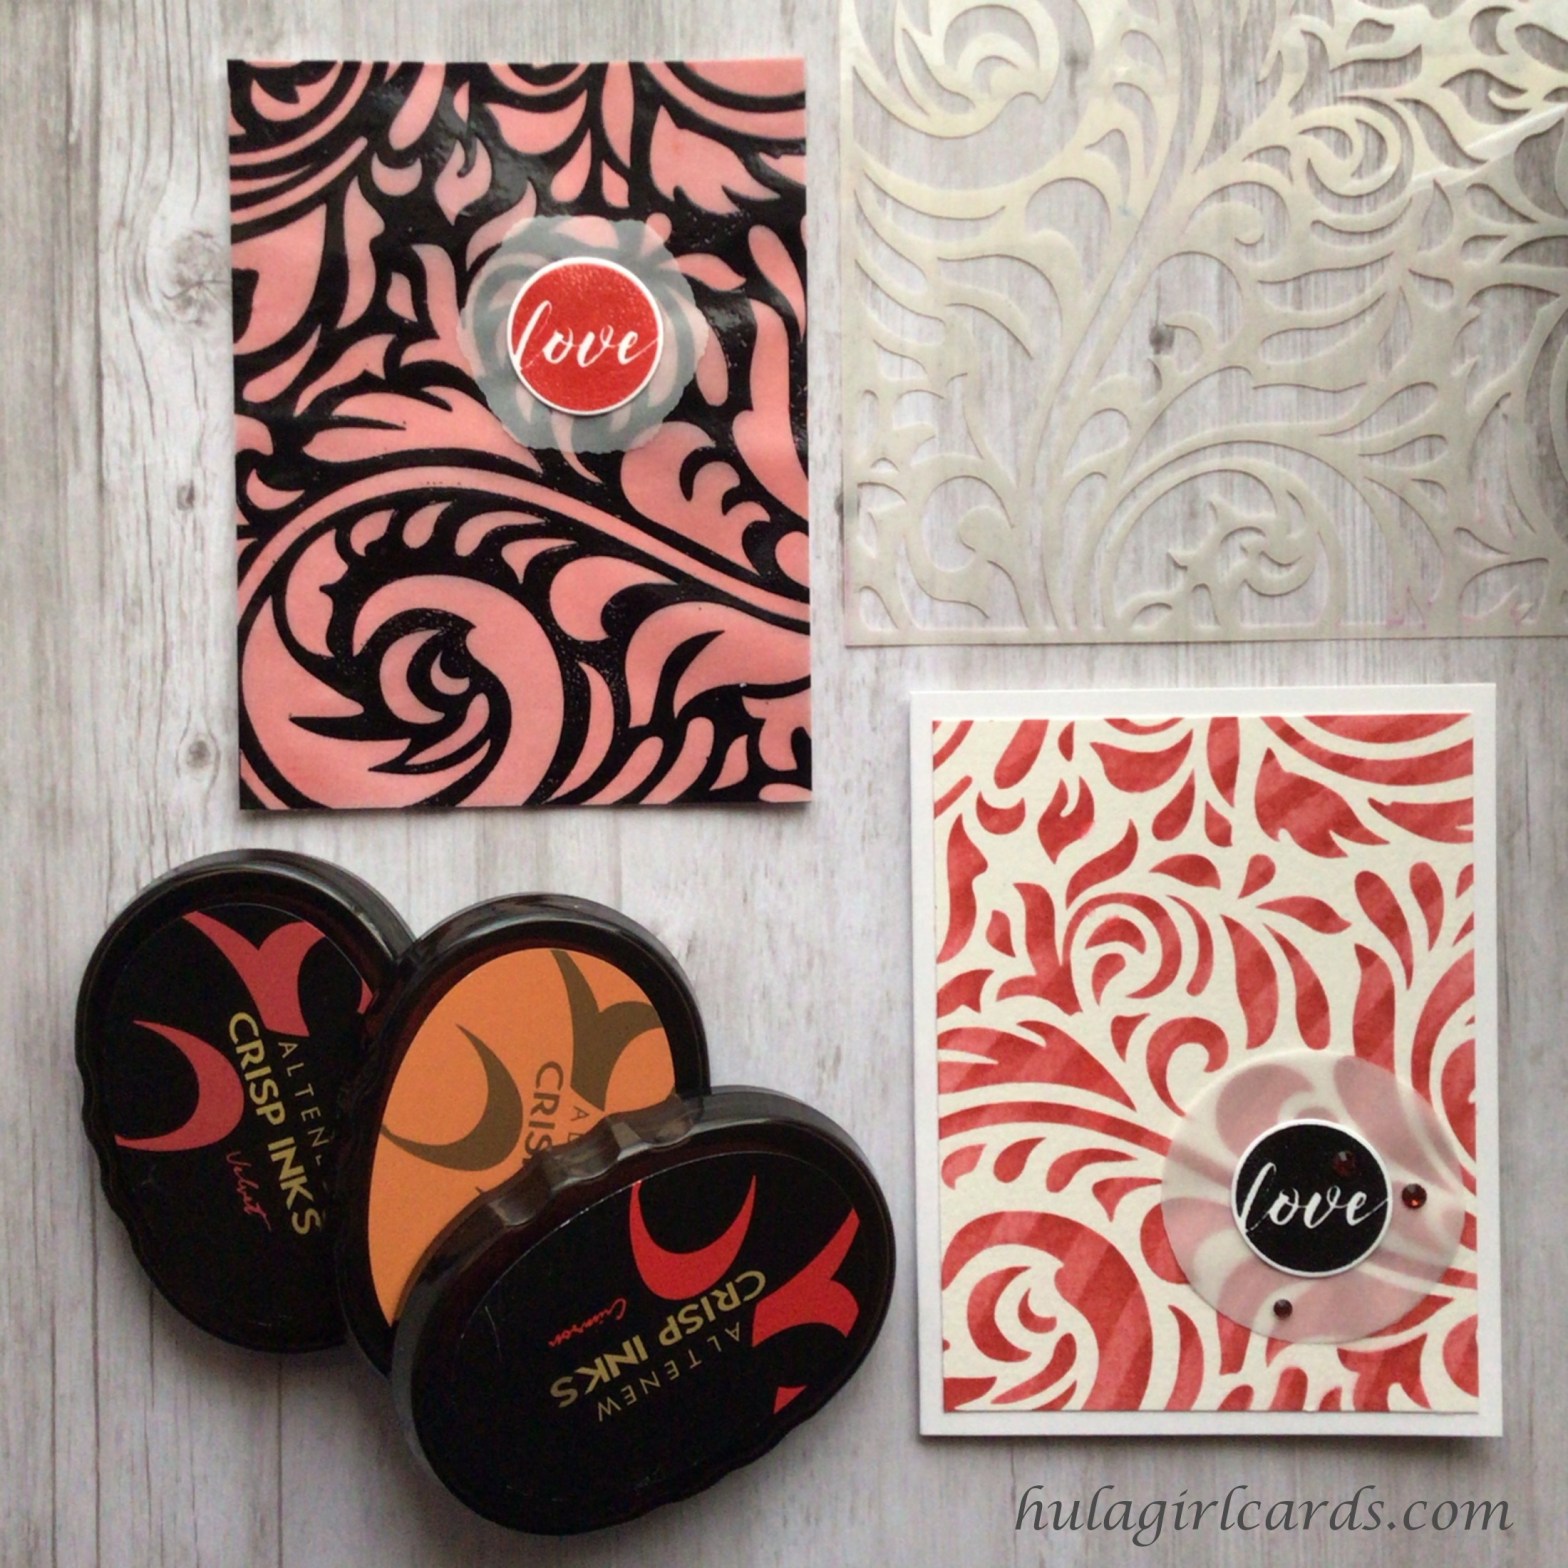
Stencils lend themselves to versatility of techniques and media. Today’s cards share many similarities, such as palette, sentiment, and stencil, even though they read as entirely different cards. The changes of layering stencils and embossing powder produce strikingly impactful variations in these cards, inspired by the AECP course Celebration: Stencil Techniques.
For the first card, watercolor paper was cut to an A2 card front size and adhered to the back of Altenew’s Elegant Swirls Stencil. Using Pink & Main’s Ergonomic Blending Brush, Altenew’s Velvet Ink was lightly brushed into the stencil’s openings until a medium shade of red was achieved. Using a dry cloth, the excess ink was removed from the stencil. Altenew’s Molded Lines Stencil was laid over the first stencil and taped onto the work surface, Altenew’s Crafter’s Essential Stamping Mat. A heavier layer of Velvet was brushed into the composite openings of the two stencils, creating a background of gently curved striations within the original blending. The background was trimmed to 4″ x 5.25″ and adhered to an A2 card base.

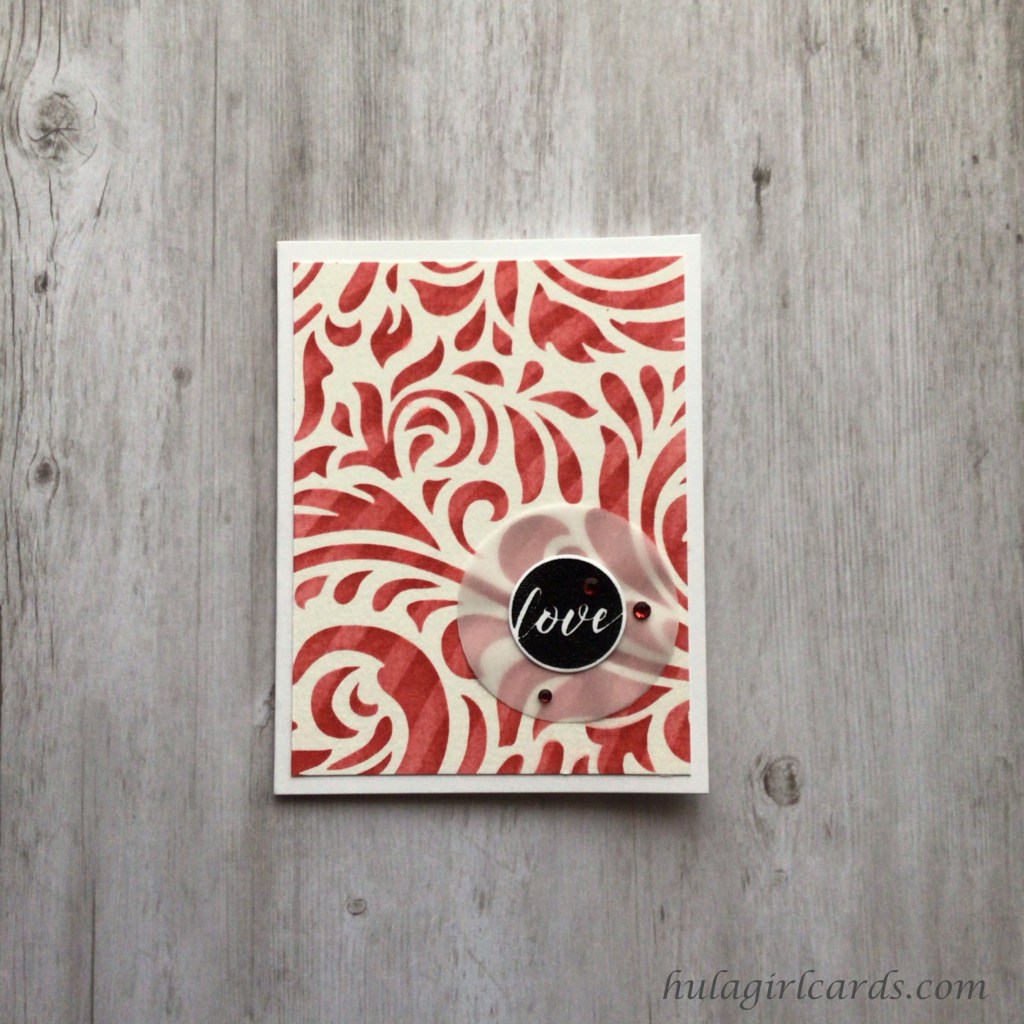
The embossed card requires two layers for a stained glass effect. After creating the card base, the backing was masked along the fold line and adhered to the work surface in an open position. Then, a heavy blend of Velvet, Crimson, and Marigold were applied to the card front until the colors seemed to glow with fiery intensity.
To create the vellum overlay, the Elegant Swirls Stencil was placed face down on a blotter sheet of copy paper, and VersaMark’s Watermark Stamp Pad was pressed onto it. While either side could have been used, applying ink to the front of the stencil would have made this card a mirror image of the striped card. By inking the back, both cards match. Then, a generously-sized sheet of vellum was prepared with an anti-static powder tool. The stencil and vellum were carefully layered in a die sandwich and passed through a die cutter so the ink transferred from the stencil to the vellum. While rubbing the vellum against the stencil was another option, the results from the die cutter were more consistent.
After pouring Wow!’s Primary Ebony Embossing Powder onto the vellum, the sheet was set with a heat gun and trimmed to an A2 card size. Because ink was applied to the stencil rather than inside the stencil’s openings, the transferred ink rests along positive areas of the stencil. The vellum’s black portions match the stencil, leaving the openings into which a medium is typically applied translucent. Glue was applied to the underside of the black channels, which enabled the vellum to adhere to the blended card front with a seamless look. No glue was visible from the front. The combination of the vellum’s translucency and the intensely blended background yielded a card that glows with subtle, flame-like color variations.

Finishing details for these cards are similar with subtle differences. Both cards feature a die-cut “love” sentiment from Altenew’s Circled Sentiments Stamp Set and vellum backing from various portions of Altenew’s Fancy Frames Die Set. The striped card’s sentiment was stamped with Altenew’s Obsidian Pigment Ink and embossed with Wow’s Clear Embossing Powder. To soften the die cut’s white rim and transition to the watercolor paper, two vellum circles from the larger of the two frames were cut and layered with a drop of glue in the center of the circles. The embossed “love” was glued on top, and a trio of red gems were added around the sentiment.
For the stained glass card, the same sentiment was stamped in layers of the three inks that comprised the background’s blend, Velvet, Marigold, and Crimson, which hints at the intensity of the background prior to adding vellum. The sentiment’s vibrancy becomes the focal point against the muted vellum background. Once again, to soften the transition from white to the card proper, a single layer of a vellum-cut backing was added behind the sentiment, using the smaller wreath in Fancy Frames. The frame’s picot perimeter suited the feathered background more than the stark contrast of a crisp geometric shape would have.
Mahalo!

The details on these cards are wonderful!! I love the colours on both. The double stenciling looks great too!
Thank you for submitting your wonderful work to the AECP assignment gallery.
LikeLike
Thank you, Erum!
LikeLike