
Aloha,
The dimensional, layered element of die-cut flowers adds a special touch to these cards, inspired by the Altenew course Easy Die Cutting Techniques.
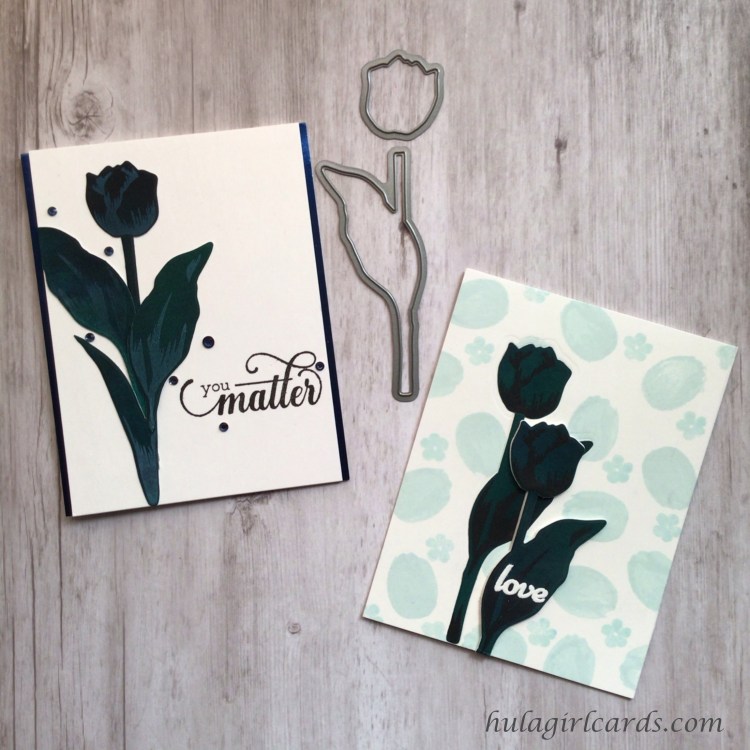
These monochromatic tulips from Altenew’s Tulip Stamp and Die Set were made with a heavy concentration of Brusho’s Pigment Powder in commingled shades of teal and dark blue. In the above photo, the tulips on the right closely match Altenew’s shade of emerald, while the card on the left has deeper notes of blue along the petals. To create these flowers, the pigment powders were sprinkled on a sheet of Canson’s cold press watercolor paper and sprayed heavily with water. As so frequently happens when crafting, the unexpected arises. The surprise of having sprinkled too much powder meant that flexibility and creativity were needed to save an otherwise grainy project. After adding copious amounts of water, the excess color was sopped with a second sheet of watercolor paper, resulting in more die-cutting options later.
Once the papers dried and were cut to widths of six inches, the width of the die machine’s cutting plates, areas of deep color saturation were chosen for the die-cutting of several stems and blossoms. It is important to note that some of the watercolor pigment transferred onto both the dies and cutting plates, so additional care was needed to clean those items to avoid future, unintended color transfer. In order to stamp the interior details of the petals and leaves, the die cuts were temporarily adhered to a sheet of copy paper. Thus secured, the die-cut elements remained stationary for the positioning of the stamps. Impressions were made with both Hero Arts’ Unicorn White Pigment Ink and Altenew’s Obsidian Pigment Ink. Using starkly contrasting inks created shadows and highlights on these deeply saturated tulip silhouettes.
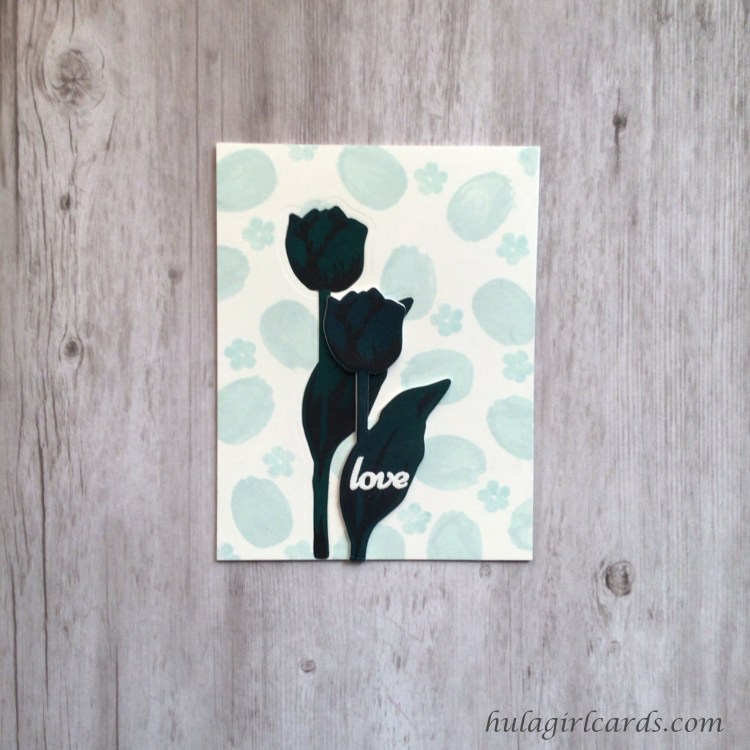
The tulip duo card features a background of tulip and posy blossoms, which were hand stamped sporadically over the card front with Altenew’s Seaglass Crisp Die Ink. Care was taken to ensure variation in the flowers’ orientation so that an organic sprinkling of flower blossoms was achieved. The closed tulip blossom has multiple layers, the base and interior layers of which were both stamped with Seaglass ink. This repeated stamping created a darker concentration of color on the interior impression so that no other ink colors were necessary.
The intended design for the background was a subtle tone-on-tone Seaglass color to complement the depth of the watercolor focal tulips. To this end, it was necessary to lightly pounce Unicorn white pigment ink with a blending brush on the background stamping to mute the layered colors so the deeper Seaglass shades lightened in intensity. A one-centimeter, five-petal flower from Altenew’s Vintage Flowers stamp set was used to fill the remaining white space of the card front’s background.
To create an outline around the first tulip shape, the dies were embossed with the aid of an embossing pad in the die-cutting machine’s layer sandwich. The die-cut tulip was adhered in the raised area, and a small halo from the impression of the die is visible around it. Then, three layers of die-cut pieces were layered with the blossom glued atop the tip of the stem. This method gave the flower a seamless look with a minimum of bulk, and the tulip acted as one piece when adhering it to the card front below the single-layer flower. The excess stem was removed with heavy paper shears after the glue set.
As a finishing detail, the “love” sentiment from the Tulip stamp set was embossed twice on the dimensional tulip with Wow!’s Opaque Bright White Regular embossing powder after preparing the surface with an anti-static powder tool. The double embossing smoothed the sentiment’s texture and increased the concentration of the white text, turning the sentiment into a meaningful focal point on the tulip duo.

The lush leaves of this solitary tulip were created by layering portions of multiple die-cut stems from three of the four stems in the die set. To create the mirror-imaged leaves, the die with the large leaf and stem were cut both on the front and back of the watercolor paper. Then, the upper stems were trimmed along the curve of the leaves. Interior stamping was again accomplished by temporarily adhering the die cuts to copy paper. The mirror image element, however, was mirror stamped by stamping the detail layer on a thin silicone mat. The mat was then turned over, carefully positioned, and pressed onto the die-cut leaf, transferring the inked impression.
To build the flower, the straight stem was adhered to the blossom, and the height of the resulting unit was auditioned on the card front and glued into place. Then, three leaf die-cuts were layered on top of the stem, effectively lengthening the flower unit. Alterations, such as trimming stems and shading layered areas with pigment ink, were made as needed until a full tulip stalk emerged.
Stamped with Altenew’s Obsidian Pigment Ink, the sentiment “you matter” from their Fancy Greetings stamp set occupies the lower third of the card beside the flower. The card front was trimmed to 4″ x 5.5″ and glued on top of thin border strips of dark blue mirror cardstock, which highlights the deep blue tones in the watercolor. Midnight blue rhinestones were added in a diagonal, triangular placement, cascading down the tulip and around the sentiment.
The layered beauty of three die-cut tulips brings added interest to these cards of encouragement.
Mahalo!

Beautiful cards! Thank you for submitting your work to the AECP assignment gallery.
LikeLike